
|
Typical Attendees
This course is suitable for anyone involved with processing pre-preg moulds, including pre-preg laminators, technicians, supervisors, engineers & designers. Structure 30% theory, 70% practical, 10 delegates maximum, no experience required Price per Delegate
£ 2,400.00 (£ 2,000.00 plus £400 VAT) |
|
Pre preg mould making course content
| DMSC56 | Session 1 09:00 - 11:00 |
Session 2 11:15 - 13:15 |
Session 3 13:45 - 15:45 |
Session 4 16:00 - 18:00 |
|---|---|---|---|---|
| Monday | Introduction Equipment issue Health & Safety Theory Introduction to composites theory, matrix, reinforcing & fabric materials |
Theory Pre-preg materials Pre-preg processing Theory Tooling and component design principles Pattern & mould materials Thermal expansion Spring back & distortion |
Theory, Demo & Practical Release agents Release pattern Pattern checking & Preparation of a two part pattern Demo Fitting pattern split/joint boards, shaped locators and bush locating dowels |
Theory, Demo & Practical Production of pre-preg moulds using the tile method Handling, preparation & application of low temperature pre-preg Lay-up first ply of first part of a two part tool using tiled materials |
| Tuesday | Theory Vacuum bagging Materials & application methods Leak detection Vacuum de-bulking Demo & Practical De-bulk first ply of single part tool |
Practical Complete lay-up of first part of a two part tool including orientated & tiled plies, double curvature, internal corners, draping, vacuum de-bulks and balancing final ply Final de-bulk |
Theory, Demo & Practical Low temperature pre-preg curing Temperature &,pressure profiles Vacuum bagging for autoclave curing Cure first stage of two part tool |
|
| Wednesday | Demo & Practical Remove split board and prepare pattern for second stage of two part tool |
Theory & Demos Templated balanced, orientated plies & ply joins for tooling Practical Template & nest plies for second mould half |
Demo & Practical Production of second part of a two part pre-preg mould, including application of templated, orientated and balanced plies, fitting drill/bolting bushes, vacuum de-bulks & cure vacuum bag |
|
| Thursday | Theory, Demo & Practical De-bag & break out split mould tools Cleaning & assembly of mould tools |
Theory, Demo & Practical Post-curing of moulds Tg points Theory & Discussion Alternative Pre-preg tooling systems |
Demo & Practical Lay-up single part tool using alternative pre-preg tooling systems, bushes, dowels, stiffening flanges, vacuum bagging & autoclave curing |
|
| Friday | Theory, Demo & Practical Safe edging, flash,removal and surface finishing of moulds Sealing & release,moulds produced |
Theory, Demo & Practical Tooling modificationsMould stiffening Loose tooling Return & nett edge tooling |
Theory & Discussion Causes of & identifying defects Final inspection of parts produced |
Reinstate Workshop Written test Equipment return Summary /Feedback |
| DMSC56 Pre-preg Mould Making.pdf |
|
This course is suitable for anyone involved with processing pre-preg moulds, including pre-preg laminators, technicians, supervisors, engineers & designers. We cover approximately 28 hours of practical throughout the week. Pre-preg mould making begins with pattern, mould and component design principles. You will learn about undercuts/lock-on conditions, join lines, pattern and mould materials, thermal expansion and distortion. These concepts are applied in the manufacture of your two part mould. As the week progresses we introduce more theory and technical detail. Your first pattern design will include split/joint boards, shaped locators and bush locating dowels. You will release and check it for damage, and accuracy of split board fit, before beginning laminating. |
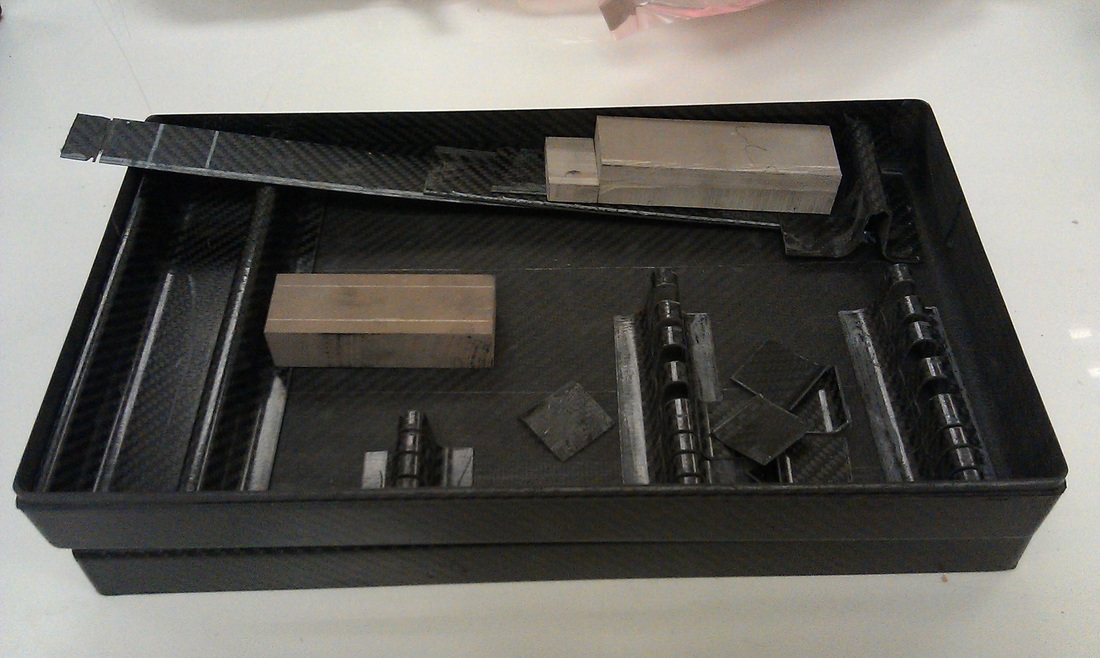
|
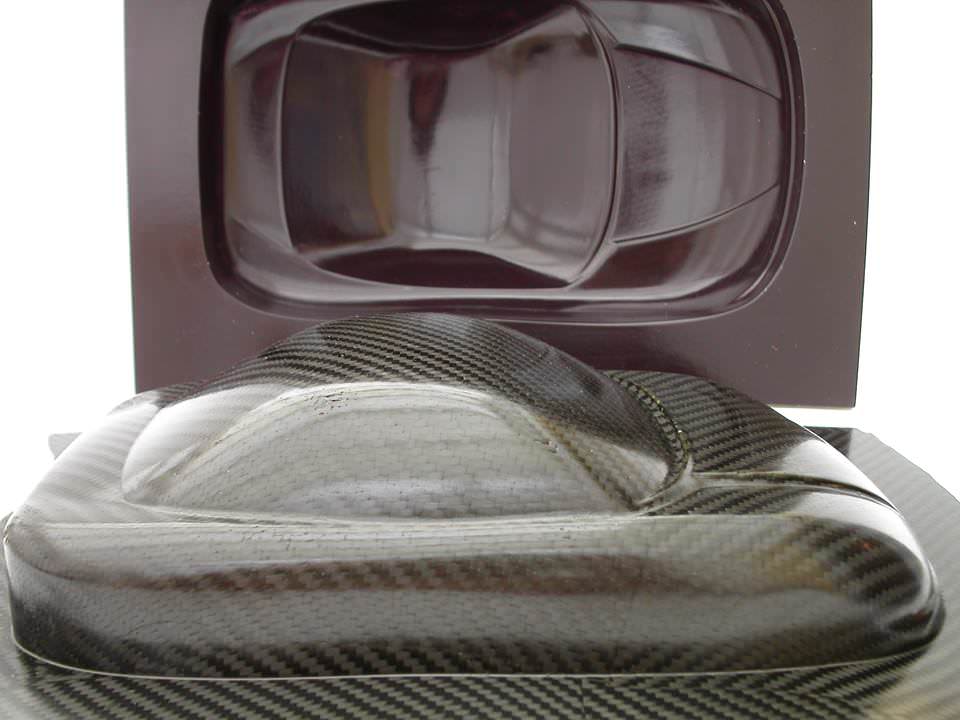
The first mould is laid up using the tile method. During the practical task you will be shown the importance of staggering your butt joins and having a layup strategy to follow. You will use vacuum bag debulks at set points during the laminating as the plies are built up. These debulks will improve the accuracy and quality of your laminate. You will be shown the best application of suitable vacuum bagging materials and how to detect leaks. Once the first mould is completed it is cured in the autoclave.
You will lay up the second mould using the templating method. Beginning by removing the split boards from the first mould and then preparing the pattern and mould for laminating. You will template and cut out your plies, allowing for orientation and balancing of the layup. The completed layup is envelope bagged and cured in the autoclave.
|
The final mould to be produced is a single part mould using an alternative pre-preg tooling system. Bushes are used and located on dowels as well as stiffening flanges. The mould is vacuum bagged and cured.
All of the cured moulds are broken off the patterns and post cured. The moulds are then safe edged, surface finished, sealed and released ready for production. We end the course with group discussion, inspection of the parts, identifying issues and possible solutions |